Welcome to the first edition of Collected Style!
The most creative decorating projects come when you are challenged
to use what you have in different ways. It is often a way of getting a new look for little expense and hopefully using inherited and found vintage pieces to bring style and charm to your home!
The past few years for my siblings and me, have been about caring for my ailing mother, selling her home and distributing her belongings after her recent passing. I live in a small to moderate sized home, about 20 years old. In the last 6 months, I have packed into my home, remnants of my mother's 6000 square foot house, pieces from her assisted living apartment, items from my son's college apartment and treasures found while out picking for my antique mall booths.
We literally have had paths to maneuver through the house.....until now! We are unpacking, cleaning out, and selling things off. I hit panic mode as it has become almost overwhelming and I certainly did not want to end up on the TV show hoarders!
Collected Style will be all about sharing how to redecorate, re-purpose, and revive your home!
My first project was to figure out how to take this custom made display case and make it work in my own home! My mom was a big collector of antique glass and had this case made 25 years ago to display part of her collection. Some of the pieces were inherited from past generations and many items she and my father collected over the years. You will notice a date stamp from 2011 on several photos - these were taken just before she moved into her assisted living to help her remember her home as it was.
She displayed her treasures around her house ~ this next antique cabinet sat at the end of a wide hallway, and is now at my sister's home. Mom had a special love for rose bowls! Almost all the glass and dishes were divided between my siblings and me...and there was A LOT!
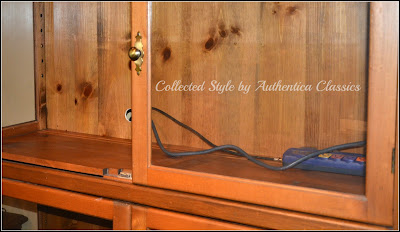
Yes, we had to drill a hole in the back of the cabinet, but here's a tip - I asked my husband to drill it within a couple inches of the stationary shelf...if I ever use it for display again, my plan is to add a 3 inch decorative strip of molding along the back of the shelf and stain it to match the cabinet. No one will ever know there is a hole there! We purchased a special surge protected power strip that everything plugs in to for our previous old buffet/TV stand, so we only had the cable wire and power strip cord to feed through the hole.
Next I needed to figure out how to fit the blue ray player in the cabinet. If we had used the first set of holes for the lowest shelf, the TV would not fit. So we measured enough height to cover the blue ray player and left a little room for ventilation. We took one of the existing shelves and raised it by way of vintage dictionary sets. One set belonged to my parents and one set I purchased from Goodwill for $5.00.
Not only did the books serve as risers, but I think they add a bit of interest. Once again we were very lucky as there was just enough space between the shelf and glass side panel to allow all the cords to pull up and over without having to cut any more holes.
Getting the TV set and sound bar plugged in and then inserting it in the case took three of us to hold, maneuver, steady and pray....but it worked! I'm looking for one more book, probably an old atlas to slide under the blue ray player to raise it up and fill the extra space.
Because I inherited the cabinet, and we already owned the power cord from our original TV set up, the total cost for this project was $5.00 for the set of dictionaries. Wait until you see what comes next....it was free!
There is so much more to do ~ and a lot more to share.
I hope you will join me on my journey to create my home with Collected Style!
Blessings,
Martha


No comments:
Post a Comment